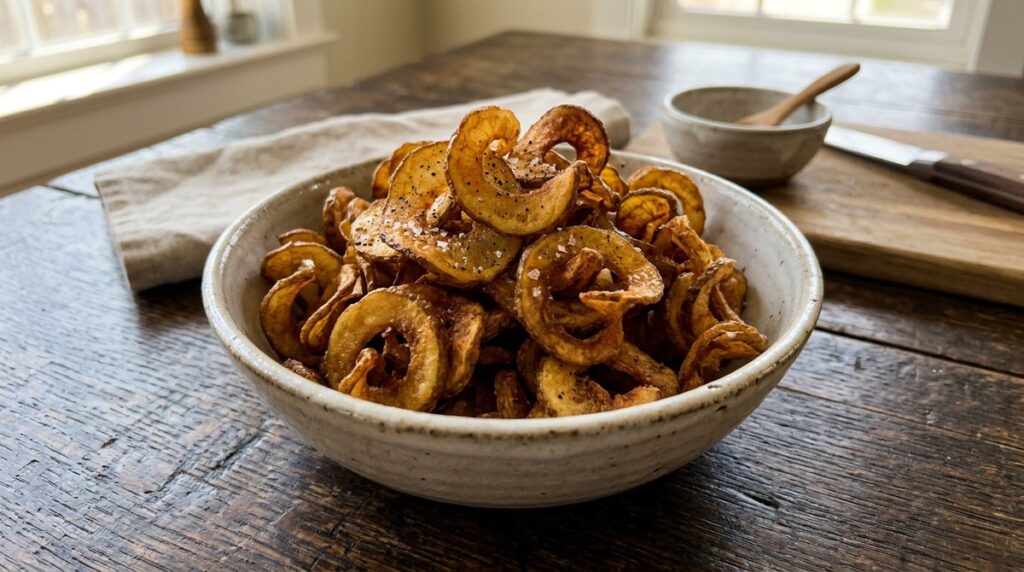
Homemade potato chips right from your air fryer are a revelation. They cook up incredibly crisp and golden without needing a pot of bubbling oil, making the whole process faster and cleaner than traditional frying.
The key is in the preparation. A quick soak, thorough drying, and careful layering in the basket turn a humble potato into a shatteringly crisp snack that rivals any store-bought bag.
This recipe walks you through every step, from slicing to seasoning, so you can pull off a batch of perfect chips whenever a salty craving hits.
Why This Works
- Soaking sliced potatoes in cold water removes excess surface starch, which is the main culprit behind chips sticking together and steaming instead of crisping.
- An air fryer’s powerful, concentrated heat rapidly evaporates moisture from the potato slices, creating a crisp exterior without the need for deep-frying.
- Using just a light toss of oil—about a teaspoon per potato—is enough to conduct heat evenly across the surface of each slice, promoting uniform browning.
- Cooking in a single, slightly overlapping layer and shaking the basket frequently ensures every chip gets exposed to the hot, circulating air.
What You Need
- Mandoline slicer or a very sharp chef’s knife
- Large bowl
- Clean kitchen towel or paper towels
- Air fryer
- Mixing bowl
- Tongs
Ingredients
- 1 1/2 pounds [680 g] russet potatoes, scrubbed clean
- 2 teaspoons vegetable, canola, or avocado oil
- 1/2 teaspoon fine sea salt, plus more to taste
- 1/4 teaspoon black pepper (optional)
Instructions
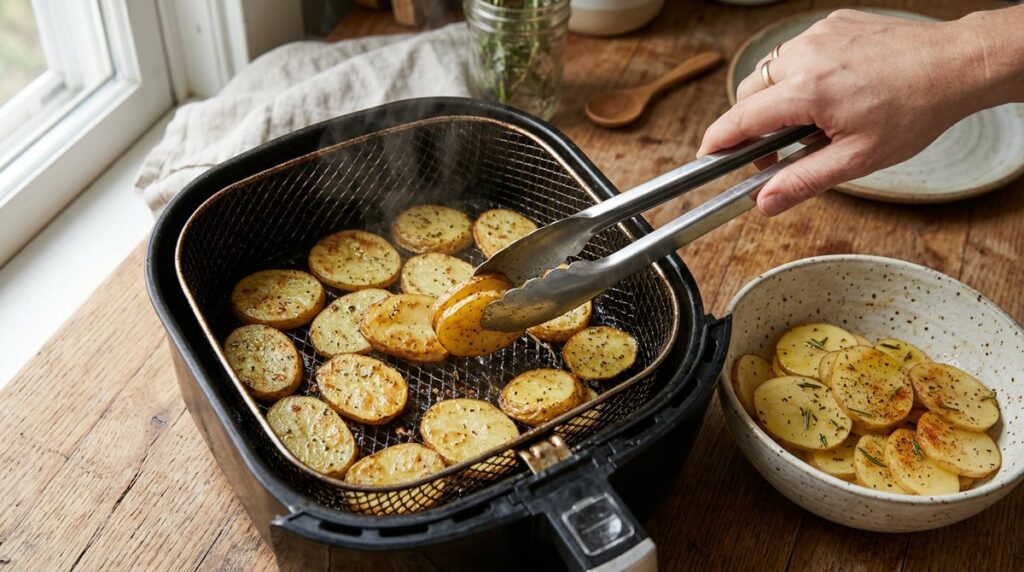
- Slice the Potatoes Thin and Even. Using a mandoline slicer set to 1/16-inch [1.5 mm] thickness, slice the potatoes directly into a large bowl of cold water. If using a knife, aim for slices that are as uniformly thin as possible, about the thickness of a dime. Consistent thickness is the single most important factor for even cooking.
- Soak and Rinse Away Starch. Swirl the potato slices in the cold water vigorously for 30 seconds. The water will turn cloudy with starch. Drain the potatoes, rinse the bowl, refill it with fresh cold water, and add the slices back in. Let them soak for 15 minutes. This step is non-negotiable for crispy chips.
- Dry the Slices Completely. Drain the potatoes and spread them in a single layer on a clean, lint-free kitchen towel or a double layer of paper towels. Press another towel on top and pat firmly until every slice is bone-dry to the touch. Any surface moisture will steam the chips and prevent crisping.
- Preheat the Air Fryer. Preheat your air fryer to 300°F [150°C] for 3 minutes. A fully heated basket starts cooking the chips the moment they hit the surface, sealing the exterior quickly. Do not skip preheating.
- Toss with Oil and Seasonings. Place the dried potato slices in a dry mixing bowl. Drizzle with the 2 teaspoons of oil and toss gently with your hands or tongs for a full minute, making sure every slice gets a very thin, even coating. Sprinkle with the salt and pepper and toss again.
- Cook in Batches, First Round. Place a single layer of potato slices in the preheated air fryer basket. It’s fine if they overlap slightly, but avoid dense piles. Cook at 300°F [150°C] for 8 minutes. The slices will begin to curl and look dry around the edges.
- Shake and Increase Heat. Remove the basket and use tongs to gently toss and separate the partially cooked chips, peeling apart any that are sticking. Increase the air fryer temperature to 350°F [177°C]. Cook for another 4 to 6 minutes, shaking the basket every 2 minutes.
- Watch for Golden Brown Perfection. During the final 2 minutes, watch the chips closely. You’re looking for a deep golden color with a few light brown spots. Chips at the edges of the basket tend to cook faster, so you can pull those out individually with tongs and let the rest finish.
- Cool and Season. Transfer the finished chips to a wire rack or a plate lined with paper towels. They will crisp up further as they cool for 2 to 3 minutes. While still warm, taste one and add another light pinch of salt if needed. The salt sticks best while the chips are slightly warm.
- Repeat with Remaining Slices. Cook the remaining potato slices in batches. There is no need to preheat again between batches, but let the air fryer come back to 300°F [150°C] before adding the next batch. The total cook time per batch is 12 to 14 minutes.
Tips for the Best Results
- Choose russet potatoes. Their high starch and low moisture content yield the crispiest chip with a light, airy texture.
- Patience with drying is key. After soaking, the slices should feel dry and slightly tacky, not slippery. Any leftover water creates steam.
- Don’t crowd the basket. Overlapping is okay, but if you can’t see at least half the basket floor through the slices, you need to cook in more batches.
- Season immediately after cooking. A sprinkle of salt or dry seasoning sticks best to the hot, freshly cooked chips while they still have a whisper of oil on the surface.
- Every air fryer runs differently. Start checking for doneness a full 2 minutes before you think they’ll be done to avoid burning.
- For extra-crunchy chips, after slicing, you can soak the potatoes for up to 2 hours in the refrigerator. Just be sure to dry them even more thoroughly.
Troubleshooting
Chips came out soggy and chewy
This is almost always due to moisture. The slices were not dried thoroughly enough after soaking, or the basket was overcrowded, trapping steam. Next time, pat them bone-dry and cook in smaller batches.
Chips are burning in spots but raw in others
Your slices are uneven. A mandoline slicer is the best tool for uniform thickness. Also, be sure to toss the chips at least twice during the 350°F [177°C] phase to rotate them in the basket.
Chips are sticking to the basket
The slices may still be too wet when they go in, or they weren’t tossed well enough in oil. Ensure they have a light, even coating of oil on all sides. You can also lightly brush the air fryer basket with oil before adding the potatoes.
Chips taste bitter or burnt
The temperature was too high for too long, or the chips were left in past the golden-brown stage. Stick to the 300°F [150°C] then 350°F [177°C] method, and pull them the moment they are deeply golden, as they will continue to darken slightly from residual heat.
Storing and Re-Crisping
Allow the chips to cool completely at room temperature within 2 hours of cooking. Store the cooled chips in a paper bag or a loosely covered bowl at room temperature for up to 2 days. Do not seal in an airtight container, as trapped humidity will soften them. To re-crisp, spread them in a single layer in the air fryer and cook at 300°F [150°C] for 2 to 3 minutes, then let cool for a minute before eating.
Variations to Try
- Salt and Vinegar: Soak the sliced potatoes in a mixture of equal parts cold water and white vinegar for 1 hour instead of plain water. Dry thoroughly and cook as directed.
- Barbecue: In a small bowl, combine 1 teaspoon smoked paprika, 1/2 teaspoon garlic powder, 1/2 teaspoon onion powder, and 1/4 teaspoon brown sugar. Toss with the chips immediately after cooking.
- Sour Cream and Onion: Mix 1 tablespoon buttermilk powder, 1 teaspoon onion powder, 1/2 teaspoon garlic powder, and 1/2 teaspoon dried chives. Sprinkle over hot chips.
- Sweet Potato Chips: Substitute sweet potatoes for russets. They brown faster due to their sugar content, so reduce the 350°F [177°C] cook time by 2 minutes and watch closely to prevent burning.
- Spicy Chili-Lime: Toss hot chips with a mix of 1/2 teaspoon chili powder, 1/4 teaspoon cayenne pepper, and the finely grated zest of one lime.
Frequently Asked Questions
Can I make these chips without a mandoline?
Yes, you can use a sharp chef’s knife. The goal is to cut the potato into slices that are as close to 1/16-inch [1.5 mm] thick as possible. Take your time and don’t rush; a consistent thickness matters more than perfect thinness. Expect a slightly more rustic, varied chip texture.
Why do I need to soak the potatoes?
Soaking pulls excess starch out of the potato cells and into the water. If you skip this step, that surface starch will gelatinize in the heat, causing the slices to glue together and steam rather than fry into separate, crispy chips.
Do I really have to dry every single slice?
Yes, thoroughly. Any water droplets clinging to a potato slice will instantly turn to steam in the hot air fryer. That steam prevents the surface from reaching the high temperature needed for crisping, leaving you with a floppy, unevenly cooked chip.
My air fryer only goes to 400°F. Can I use that setting?
Stick to the temperatures listed in the recipe: 300°F [150°C] and 350°F [177°C]. A 400°F [204°C] setting is too aggressive for thin potato slices and will scorch the delicate edges before the center has a chance to crisp up, resulting in a burnt, bitter flavor.
Can I use other types of potatoes?
Russets are ideal for a classic light and crispy chip. Yukon Gold potatoes will also work and produce a slightly denser, more buttery-tasting chip. Avoid waxy red potatoes, as their high moisture and low starch content make them very difficult to crisp up in an air fryer.
How can I make a larger batch without it taking forever?
While you must cook in single layers, you can speed up the overall process by using two air fryers if you have them, or by prepping a very large batch of potatoes. Keep the uncooked, dried slices covered with a damp paper towel in the refrigerator for up to an hour while you work through the batches.