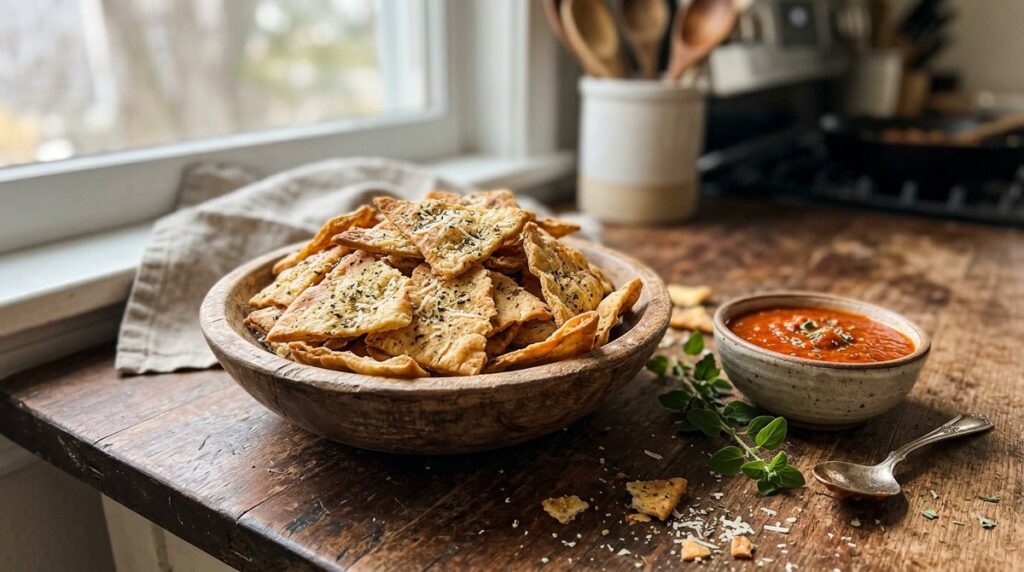
Day-old pita bread is the secret to making the crunchiest homemade chips. This simple recipe uses pantry staples like garlic powder, dried oregano, and grated Parmesan to transform dry bread in just 20 minutes. They bake up golden and sturdy enough to scoop through your favorite thick dips.
Why This Works
- Day-old pita contains less moisture, so it crisps faster and stays crunchier longer than fresh bread.
- Coating the wedges with oil before adding dry seasonings helps the cheese and herbs stick evenly without clumping.
- A 375°F [190°C] oven is hot enough to drive off remaining moisture quickly but not so scorching that Parmesan burns before the chips turn golden.
- Spreading the chips in a single layer with a little space between each piece lets hot air circulate all around for even browning.
- Letting them cool completely on the baking sheet finishes the crisping process—the chips firm up dramatically as they rest.
What You Need
- Rimmed baking sheet
- Parchment paper or silicone baking mat
- Large mixing bowl
- Sharp chef’s knife
- Measuring spoons
- Spatula or tongs
Ingredients
- 2 large (or 4 small) pita breads [about 6 ounces / 170 g total], preferably day-old
- 3 tablespoons [45 ml] extra-virgin olive oil
- 1/2 teaspoon garlic powder
- 1/2 teaspoon dried oregano
- 1/4 teaspoon fine sea salt
- 1/4 cup [20 g] finely grated Parmesan cheese
Instructions
- Preheat the oven. Set a rack in the middle position and preheat the oven to 375°F [190°C]. Line a rimmed baking sheet with parchment paper or a silicone mat. Getting the oven hot before you start ensures the chips hit an even, high heat immediately.
- Cut the pita. Stack the pita breads and cut them in half, then cut each half into 4 wedges to make 8 triangles per large pita. For small pocket pitas, simply cut each into 6 wedges. Keep the pieces roughly the same size so they bake evenly. Separate any doubled layers if the pita splits—each thin piece will become extra crisp.
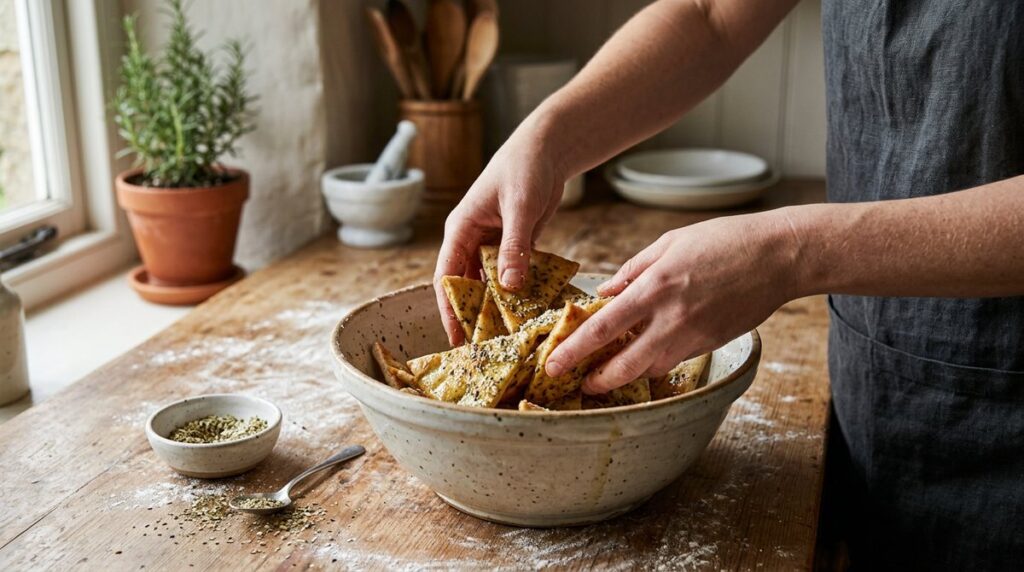
- Season the wedges. Place the pita wedges in a large mixing bowl. Drizzle with the olive oil and toss with your hands or a spatula until every piece is evenly coated. Sprinkle the garlic powder, dried oregano, and salt over the top, then add the grated Parmesan. Toss again thoroughly so the seasoning and cheese cling to all sides.
- Arrange on the sheet. Spread the seasoned wedges in a single layer on the prepared baking sheet. Aim for a little space between each chip—if they overlap, they’ll steam instead of crisp. If needed, use two sheets or work in batches.
- Bake until golden. Slide the sheet into the oven and bake for 8 to 12 minutes. At the 5-minute mark, flip each chip with tongs or a spatula for even coloring. Watch closely after 8 minutes: the edges should turn deep golden brown and the chips will feel dry to the touch. Parmesan can darken quickly, so pull the pan the moment they look crisp.
- Cool completely. Remove the sheet from the oven and let the chips cool right on the pan for at least 5 minutes. They will continue to crisp up as they cool. Don’t stack or move them while still warm, or they might steam and soften.
- Check for doneness. Once cooled, test one chip. It should snap cleanly with no chewy center. If any feel soft underneath, return those pieces to the oven for 1 to 2 minutes, then cool again. The chips are ready to serve or store once they are completely brittle.
Tips for the Best Results
- If your pita is fresh and soft, separate the layers and leave them out on the counter for 30 minutes or pop them into a warm oven for 5 minutes to dry slightly before cutting.
- Grate your own Parmesan from a wedge—pre-grated cheeses often contain anti-caking agents that can prevent the cheese from toasting and sticking as well.
- Toss the chips in a bowl rather than drizzling on the baking sheet; this gives a more even coating and avoids oily spots that can smoke in the oven.
- Don’t overcrowd. If the sheet is too packed, the chips steam instead of roast. Use two sheets and rotate them halfway through if needed.
- If you want a deeper savory note, add a pinch of onion powder or smoked paprika with the dry seasonings.
- Keep a close eye during the last 2 minutes—Parmesan goes from toasty to burnt very fast, and the garlic powder can become bitter if it blackens.
Troubleshooting
Chips came out soggy in the middle
They likely needed a minute or two longer in the oven, or the pita was too fresh and retained moisture. Next time, dry the pita first by toasting briefly or leaving it out uncovered for a few hours. Also check that your oven rack is in the middle; baking too low can trap steam.
Chips taste burnt and bitter
The oven temperature may have been too high, or they were baked beyond the 12-minute mark. Garlic powder and Parmesan burn quickly past a certain point. Reduce the heat by 25°F [about 15°C] and start checking at 8 minutes. If using a dark baking sheet, lower the temperature to 350°F [175°C] since dark pans brown faster.
Storing and Re-Crisping
Once completely cool, store the chips in an airtight container at room temperature for up to 5 days. Be sure to cool the leftovers completely within 2 hours of baking before sealing them in the container. If they soften from humidity, spread them on a baking sheet and warm in a 350°F [175°C] oven for 3 to 5 minutes. Leave the container open to the air for the first hour after cooling to release any residual steam before sealing.
Variations to Try
- Rosemary and sea salt: Swap the oregano for 1 teaspoon dried rosemary, crushed between your fingers, and finish the baked chips with a pinch of flaky sea salt.
- Everything bagel: Replace the oregano and salt with 1 tablespoon everything bagel seasoning. Toss with the oil first, then sprinkle on the Parmesan so the seeds stick.
- Spicy chili: Add 1/2 teaspoon ancho chili powder and a pinch of cayenne pepper to the seasoning mix. A squeeze of fresh lime juice over the hot chips right out of the oven wakes up the heat.
- Air fryer method: Preheat the air fryer to 350°F [175°C]. Cut and season the wedges as directed, then arrange in a single layer (work in batches) and cook for 5 to 7 minutes, shaking the basket halfway through. Watch closely—air fryers cook faster, and Parmesan can char at the edges.
Frequently Asked Questions
Can I use fresh garlic instead of garlic powder?
Fresh garlic is difficult here because it burns at high baking temperatures and turns bitter. Garlic powder disperses evenly and gives a mellow, roasted flavor without scorching. If you really want fresh garlic, mince it very finely, mix it into the oil, and lower the oven to 350°F [175°C], but check frequently—it can still darken.
Can I make these with whole wheat pita?
Absolutely. Whole wheat pita works just as well and adds a nuttier flavor. The baking time stays about the same, but because whole wheat breads can dry out faster on the outside, start checking at 7 minutes. The chips may appear darker even when not burnt, so rely on texture rather than color alone.
My chips seem oily. How can I prevent that?
Oily chips usually mean too much oil or uneven tossing. Stick to the 3 tablespoons [45 ml] for two large pitas—that’s enough to coat without pooling. After tossing, the wedges should look glistening, not wet. If you see oil collecting on the parchment, blot them gently with a paper towel before baking.
Can I use a different cheese?
Yes, any hard, finely grated cheese that melts and crisps well works. Pecorino Romano gives a sharper, saltier bite, while aged Asiago adds a creamier note. Avoid soft or high-moisture cheeses like fresh mozzarella—they melt into a puddle and won’t get crisp.
Do I have to flip them halfway?
Flipping isn’t strictly mandatory, but it makes a big difference in evenness. The underside tends to brown less because the sheet blocks direct heat. A quick flip with a spatula at the 5-minute mark ensures both sides turn uniformly golden and the chips dry out thoroughly.
How do I know when they’re truly done?
The chips are done when they feel dry and rigid to the touch, and the edges are a deep golden brown. They’ll still have a little give just out of the oven but will harden as they cool. If you press the center of a cooled chip and it yields at all, it needs more oven time.