
You can get the satisfying snap of store-bought potato chips at home using your oven.
The trick lies in a few simple techniques that prevent steam from making the slices limp.
By slicing them thin, removing excess starch, and drying them completely, you will get perfectly crispy results every time.
Why This Works
- Soaking in cold water pulls out surface starch, which is the main culprit behind gummy, chewy chips.
- Drying every slice with a towel eliminates moisture that would otherwise steam the chips in the oven.
- A light coating of oil conducts heat evenly across the surface, helping the potato slices crisp up beautifully in the oven’s heat.
- Baking in a single layer with space between slices lets hot air circulate so each chip crisps instead of steaming its neighbor.
- Flipping halfway through ensures both sides brown evenly, and pulling chips as they turn golden prevents burning while the rest finish.
What You Need
- Mandoline or very sharp chef’s knife
- Large mixing bowl
- Clean, lint-free kitchen towel or paper towels
- Two large rimmed baking sheets
- Parchment paper or silicone baking mats
Ingredients
- 1 1/2 lb (680 g) russet potatoes, scrubbed (do not peel unless you prefer to)
- 2 tablespoons neutral vegetable oil (such as canola or grapeseed)
- 3/4 teaspoon fine sea salt, plus more for finishing
Instructions
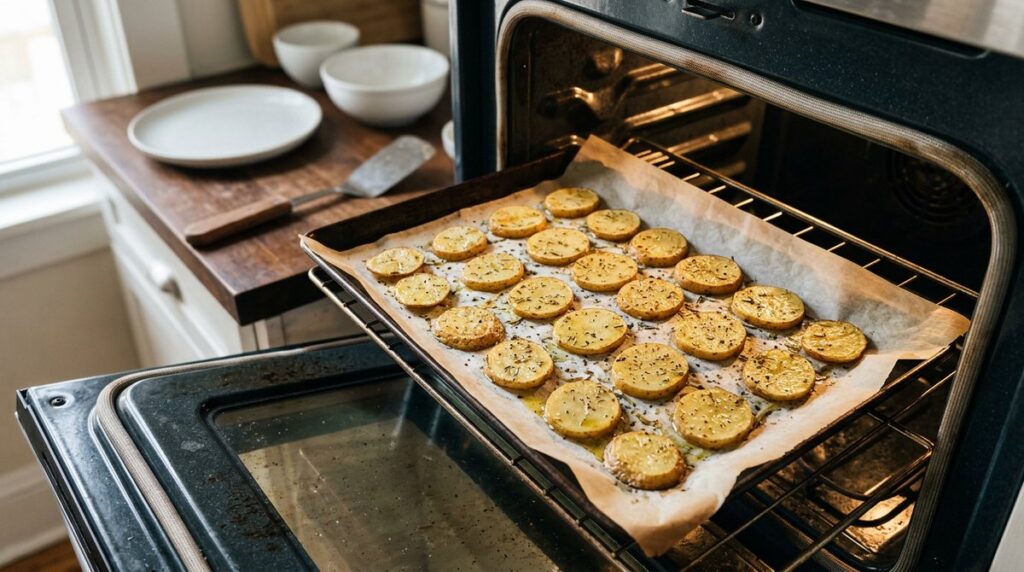
- Slice the potatoes paper-thin. Using a mandoline set to 1/16 inch (1.5 mm), slice the potatoes crosswise into rounds. If using a knife, aim for the thinnest, most even slices you can manage. Uniform thickness is the single most important step for even crisping.
- Soak in cold water. Place the slices in a large bowl and cover with cold water. Swish them around, then let soak for 30 minutes. You’ll see the water turn cloudy as starch releases. Drain and rinse under fresh cold water until it runs clear.
- Preheat the oven. While the potatoes are soaking, set your oven to 400°F (200°C) with racks in the upper and lower thirds. Line two baking sheets with parchment paper or silicone mats. Do not use foil, as it can cause sticking and uneven browning.
- Dry every slice completely. Spread the rinsed slices in a single layer on a clean kitchen towel. Pat them very dry with another towel or paper towels, pressing gently. Any remaining surface moisture will create steam in the oven, so take your time here.
- Toss with oil and salt. In a large dry bowl, combine the dried potato slices, oil, and 3/4 teaspoon salt. Toss gently with your hands until every slice is lightly and evenly coated. The oil should be just enough to give a sheen, not puddle.
- Arrange in a single layer. Place the slices on the prepared baking sheets in a single layer with no overlapping. A little space between each chip is ideal—crowding will trap steam and leave you with soft spots. Use both sheets rather than piling.
- Bake and flip. Bake for 10 minutes. Then rotate the pans from top to bottom and front to back, and carefully flip each chip with a thin spatula. Continue baking for another 8 to 12 minutes, watching closely. Chips are done when they are deep golden and feel firm in the center.
- Cool and season. As chips brown, remove them individually to a wire rack; they’ll crisp further as they cool. Sprinkle with a little extra salt while warm. Let them cool completely for maximum crunch—this takes about 5 minutes.
Tips for the Best Results
- A mandoline is the best tool for paper-thin, even slices. If you must use a knife, take your time and aim for 1/16 inch (1.5 mm) or thinner.
- Soak for at least 30 minutes; an hour is even better. Change the water once if it gets very cloudy.
- Really dry the slices. After towel drying, you can spin them in a salad spinner to fling off extra moisture, then pat again.
- If your oven has a convection setting, use it—the moving air boosts crispness. Reduce the temperature to 375°F (190°C) and check a couple of minutes earlier.
- Season immediately after baking while the chips are still slightly oily and warm so salt and spices stick.
- Bake in batches if needed. Piling chips on one sheet guarantees soggy results, so don’t rush.
- Safety first: While this oven method does not require deep-frying, if you ever cook with hot oil on the stovetop, never leave it unattended and always keep a lid nearby to extinguish any flames.
Troubleshooting
Chips came out soggy
This almost always comes from moisture. Make sure you soaked and then dried the slices completely. Also check that the slices weren’t overlapping on the baking sheet and that your oven was fully preheated to 400°F (200°C). Thick slices can also stay soft in the center, so aim for paper-thin.
Storing and Re-Crisping
Cool leftovers completely within 2 hours, then store in an airtight container at room temperature for up to 3 days. If they lose their snap, spread them on a baking sheet and reheat in a 350°F (175°C) oven for 3 to 5 minutes until crisp again. Do not refrigerate, as humidity will make them stale.
Variations to Try
- Salt and vinegar: Add 2 tablespoons white vinegar to the soaking water, then toss with oil and a little extra vinegar powder if you have it.
- Barbecue: After baking, toss warm chips with a mix of smoked paprika, brown sugar, garlic powder, and a pinch of cayenne.
- Rosemary and garlic: Finely mince fresh rosemary and a small garlic clove, then toss with the oil before coating the slices. Watch garlic closely so it doesn’t burn.
- Spicy chili: Sprinkle with chili powder, cumin, and a little lime zest right after baking.
- Parmesan and black pepper: Grate fresh Parmesan over the hot chips and crack black pepper on top; the residual heat will melt the cheese slightly.
Frequently Asked Questions
Why do I need to soak the potatoes?
Soaking removes surface starch, which otherwise turns gummy and prevents the chips from crisping. It also helps the slices brown more evenly in the oven.
Can I make these without a mandoline?
Yes, but it takes patience. Use a very sharp chef’s knife and try to slice as evenly and thinly as possible—about 1/16 inch (1.5 mm). Uneven slices will bake at different rates, so pull thin ones early.
What kind of potatoes work best?
Russet potatoes are ideal because their low moisture and high starch content produce the crispiest chips. Yukon Golds will work but yield a slightly less crisp, more tender chip. Avoid waxy red potatoes.
My chips are burning before they get crisp. What’s wrong?
Your oven may run hot, or the slices are too thin in spots. Try reducing the temperature to 375°F (190°C) and baking a few minutes longer. Also check that your baking sheets aren’t dark nonstick, which can cause faster browning.
How can I make them extra crispy?
After soaking and drying, you can toss the slices with a teaspoon of cornstarch along with the oil. The cornstarch absorbs residual moisture and adds a delicate crunch. Also, be sure to cool the chips on a rack, not a plate, so air circulates underneath.
Can I prepare the potatoes ahead of time?
You can slice and soak the potatoes up to 2 hours in advance. Keep them submerged in cold water in the refrigerator, then drain, dry, and proceed with the recipe. Do not slice and leave them exposed to air, or they’ll discolor.